How to Photograph Clothes to Sell: 9 Steps to Better Listings
- The Short Answer: Light, Preparation, and Consistency
- Step 1: Steam and Prep the Garment First
- Step 2: Find Your Light (It's Probably a Window)
- Step 3: Set a Clean, Neutral Background
- Step 4: Choose Your Method — Flat Lay, Hanging, or Worn
- Step 5: Shoot the Complete Set
- Step 6: Photographing Designer Bags and Accessories
- Step 7: Photograph Flaws Like You're the Buyer
- Step 8: Edit Lightly — Brighten, Don't Beautify
- Step 9: Optimize for the Platform
- A Repeatable Routine Beats a Perfect Photo
The Short Answer: Light, Preparation, and Consistency
To photograph clothes to sell, shoot in bright, indirect natural light against a plain neutral background, steam every garment first, and capture a consistent set of shots: a full front view, back view, label, fabric close-up, measurements, and honest photos of any flaws. A smartphone is plenty — presentation matters far more than the camera. Experienced resellers consistently report the same thing: listings with clean, well-lit, complete photo sets tend to move faster and draw fewer buyer questions than listings built on one dim photo of a wrinkled garment on a bed.
That's the whole method in a paragraph. The rest of this guide walks through the nine steps that turn it into a repeatable routine — because if you're selling more than a piece or two, repeatability is what saves you. Photography is also the single highest-leverage skill in selling designer clothes online: buyers can't touch the garment, so your photos are the garment.
Step 1: Steam and Prep the Garment First
No lighting setup rescues a wrinkled shirt. Before the camera comes out:
- Steam or press every piece. A handheld steamer is the resale seller's best friend — faster than ironing and safer on delicate vintage fibers.
- Lint-roll wool, knits, and anything dark.
- Button buttons, zip zippers, tie belts. Undone closures read as carelessness.
- Remove your own tags and clips from the frame — nothing in the shot but the garment.
For older pieces, be gentle: high heat can scorch aged silk and rayon. When in doubt, steam from a few inches away rather than pressing directly.
Step 2: Find Your Light (It's Probably a Window)
The best lighting for photographing clothes at home is bright, indirect daylight from a large window. Set up so the window is behind you or to your side, lighting the garment face-on or at a slight angle. Avoid:
- Direct sun, which creates harsh shadows and blows out color
- Overhead ceiling lights, which cast yellow tones and downward shadows
- Mixed light (window plus lamp), which confuses your camera's white balance
Shoot mid-morning or mid-afternoon on an overcast-to-bright day if you can. If your schedule or climate won't cooperate, a pair of inexpensive softbox lights or a ring light gives you the same soft, even effect on demand — and lets you shoot at night. Whatever you choose, use the same light for every listing so your closet looks consistent as a storefront.
Step 3: Set a Clean, Neutral Background
Your background should disappear. Good options cost almost nothing:
- A white or light-gray wall
- A sheet of white foam board or seamless paper for flat lays
- A plain wooden floor or neutral rug if it's clean and uncluttered
Skip busy bedspreads, carpet with visible texture, and anything with your laundry in frame. White and pale gray are safest because they keep colors true; a warm cream background can shift how whites and pastels appear on screen.
Size the background to the garment: one foam board covers folded knits and accessories, but a maxi dress needs floor space or a full-length wall. Two boards taped into an L — one flat, one propped upright — give you a corner with no hard crease line, the cheapest stand-in for a studio sweep. Then leave a hand's width of empty space around the garment so a platform's auto-crop can't clip a sleeve, and check that your own shadow isn't falling across the frame. One exception to the white-is-safest rule: ivory and pale silks can vanish into white, and a mid-gray board separates them better.
Step 4: Choose Your Method — Flat Lay, Hanging, or Worn
Each presentation style has a real trade-off, including in what it costs you in time and equipment:
| Method | Best for | Roughly what it takes | Watch out for |
|---|---|---|---|
| Flat lay | Knits, tees, jeans, kidswear; fast batch shooting | 2–4 min; foam board or clean floor, plus tissue paper | Can look flat and shapeless if not styled |
| Hanging | Dresses, blazers, coats, silky fabrics that need drape | 3–5 min; a wooden or velvet hanger and a rail or door frame | Wire hangers dent shoulders; crop or hide the hook |
| On a body or mannequin | Fitted pieces, vintage with unusual proportions | 10–15 min; a model or dress form, plus a tripod or second pair of hands | Fit must be true to the size listed; a modern form can misrepresent older proportions |
Treat those times as relative, not absolute — they assume a setup you already have standing. You don't have to pick one method forever, either; many strong sellers hang structured pieces and flat-lay everything else. What matters is that the buyer can see the garment's true shape.
Flat Lay Photography Tips That Actually Help
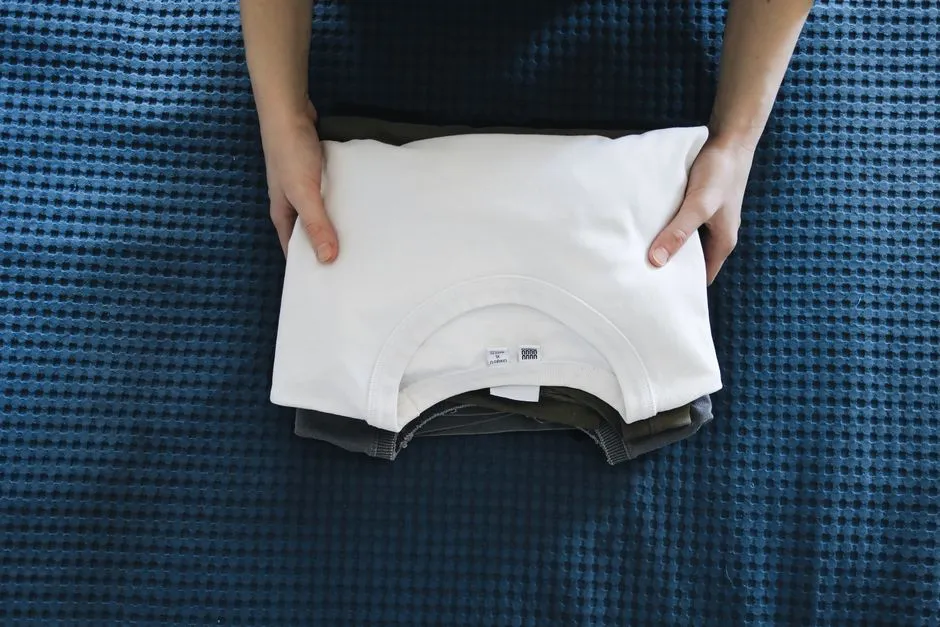
- Shoot from directly overhead, phone parallel to the garment, so proportions aren't distorted.
- Pad the inside lightly — tissue paper in sleeves and the body gives dimension and mimics a torso.
- Style the sleeves with a soft bend at the elbow rather than stick-straight at the sides.
- Smooth the fabric outward from the center; small ripples photograph as big shadows.
- Keep props minimal or absent. A single accessory can suggest styling; three is clutter.
Step 5: Shoot the Complete Set
Buyers on every platform want to answer the same questions: what is it, what condition is it in, and will it fit? Cover them all:
- Front, full garment — your cover shot
- Back, full garment
- Brand label and size tag
- Fabric content and care tag
- Close-up of the fabric texture so the buyer can judge material quality
- Details that sell — buttons, hardware, embroidery, lining, unusual seams
- Measurement shots — the garment lying flat with a tape measure across the chest, waist, and length
- Every flaw — see Step 7
For vintage, the label shot pulls double duty: experienced buyers use label design to date a piece, so shoot it sharp, straight-on, and well lit.
Step 6: Photographing Designer Bags and Accessories
Designer bags deserve extra rigor, because buyers are — rightly — wary of fakes. For a bag listing, photograph:
- All four sides plus the base, since corner and base wear drive price
- The interior, lining pulled open in good light
- Serial numbers, date codes, or brand stamps, in sharp focus
- Hardware close-ups — zipper pulls, clasps, engravings, stitching around handles
- Included extras: dust bag, authenticity cards, receipts, straps
Stuff the bag lightly with tissue so it holds its intended shape, and stand it on a clean surface with the camera at roughly the bag's own height rather than looking down on it from above. Detailed, honest photos of these exact points are what serious buyers look for on the platforms compared in our guide to the best places to sell designer bags — and clear serial-number shots make third-party authentication smoother if the platform or buyer requests it. For a high-stakes piece, having it authenticated by a reputable service before listing is worth the fee; your photos should support that process, not substitute for it.
Step 7: Photograph Flaws Like You're the Buyer
This step feels counterintuitive and is non-negotiable. Photograph every flaw clearly: pilling, small holes, missing buttons, fading, hem wear, cracked leather, interior stains. Get close, get it in focus, and consider placing a coin or your fingertip beside a small flaw for scale.
Why this helps you rather than hurts you:
- It reduces returns and disputes. A disclosed flaw is a condition of sale the buyer accepted; an undisclosed one is usually grounds for a return under most platforms' buyer protection, though the specifics vary by marketplace and by case.
- It builds trust that carries across your whole closet. Buyers who see honest flaw photos believe your "excellent condition" claims on other listings.
- It saves time. Fewer "can you send more pics of the stain?" messages.
Flawed pieces still sell — they just need to be priced for their condition, which is exactly what a disciplined approach to pricing vintage clothing accounts for.
Step 8: Edit Lightly — Brighten, Don't Beautify
Editing should make the photo match reality, not improve on it.
- Do: bump exposure slightly, straighten the frame, crop dead space, correct white balance so whites look white.
- Don't: saturate colors, smooth textures, or use filters. A "vibrant" filter that turns a faded burgundy into cherry red earns you a return and a bad review.
A workable order: straighten, crop, set white balance, then adjust exposure last so you're judging brightness on the final frame. If your editor has a white-balance eyedropper, tap it on something genuinely neutral — the foam board, not the garment.
Then edit for the set, not the photo. Adjust one image and paste those settings across the rest of the listing; most phone editors do this in two taps. Mismatched edits within one listing look worse than no edits, because the buyer sees the same jacket in three slightly different colors and trusts none of them. And never crop or brighten a flaw out of existence — those shots most need to stay literal.
Your phone's built-in editor is enough. If a color still won't render true — reds and purples are notorious — say so in the description ("color is closest to photo 3").
Step 9: Optimize for the Platform
A few practical rules, using Poshmark as the common example:
- Shoot square-friendly. Poshmark displays photos in a square crop, so compose with the garment centered and breathing room on all sides. Square-safe framing also travels well to other marketplaces.
- Make the cover shot count. The first photo is the only one buyers see while scrolling — it should be your brightest, cleanest, full-garment front view.
- Use your photo allowance. Most marketplaces allow somewhere between 8 and 20+ photos per listing. More angles mean fewer questions; there's rarely a good reason to stop at three.
- Keep a consistent look across your closet. Same background, same light, same framing. A cohesive grid reads as a professional seller and earns follows, shares, and repeat buyers.
If you'd rather skip the camera work entirely, that's a legitimate choice too — it's one of the main trade-offs weighed in consignment vs selling it yourself, where the consignment platform handles photography in exchange for a cut of the sale price.
A Repeatable Routine Beats a Perfect Photo
The sellers who move the most inventory aren't the ones with studio equipment — they're the ones with a system. Batch your prep: steam five garments, shoot five garments, edit once, list all week. Keep your setup assembled in a corner if you can, because a setup you have to rebuild is a setup you'll avoid.
Good photos won't make a bad garment desirable, but bad photos routinely make desirable garments invisible. An afternoon spent building this routine often pays for itself quickly.